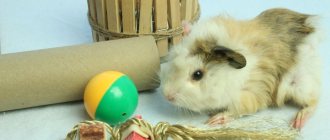
Active and playful rats should be given a lot of time and attention, otherwise the pet may become bored and even depressed. Therefore, caring owners come up with various life hacks that help not only entertain the rat, but also satisfy its curiosity and passion for adventure.
How to set up a play area for rats
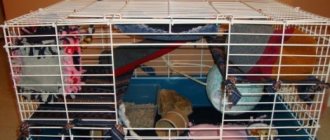
Rats need space to play freely. Unlike other small rodents, they cannot stay in their cage for long. There are people who allow rats to roam around the house, but this is usually a bad idea. However, creating a safe area for your pet to play is the best way to keep rats entertained without damaging furniture in your home.
- Remove anything from the area that could harm rodents.
When creating a play area, make sure electrical wires are hidden. They can hurt your rat. Also clear the area of any toxic substances or sharps. Choose a place away from people and other animals.
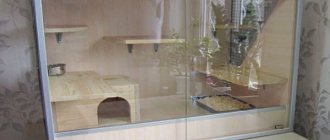
The best place to place a rat entertainment area is in the corner of the room or on a wooden floor. The main thing is to arrange the area away from important things that can be easily chewed by animals, and away from electrical outlets.
- Place the blanket on a flat surface to protect it from damage.
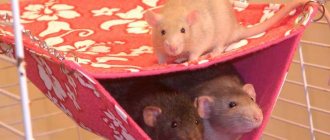
It's best to plan the play area on a raised surface, but you can install it on the floor as well. Rats have an instinctive tendency to chew things, so it is worth covering the table or floor with a blanket to protect the surface.
If you set up a play area on a table, you won't have to build a fence around the area because rats won't jump from heights. Base your choice on your pet's personality to decide whether to keep them free or build a barrier.
Create an entertainment area on the floor for easier monitoring of your pets. However, rats may start chewing your carpet if they chew through your blanket.
- Cut and glue flat cardboard panels of the same size.
Take a few boxes, arrange them, and cut them until you are left with at least a few dozen pieces of the same size. Use duct tape to cover the holes and smooth out the folding parts so that each panel is completely flat. Then line up the panels side by side and tape the edges to form one long flexible barrier.
- Place a cardboard barrier around your chosen area in a circle.
Making sure the barrier is secured to the blanket, surround the area with cardboard in a circle shape until the two ends meet. Clamp the ends together and double-check for any holes that could allow rats to slip through. Then cover these holes with tape and you are ready to start adding toys.
PROJECT MYSHKO - assembly instructions
For work we will need a lot of empty plastic bottles. Their number depends on the desired size of the future labyrinth. More bottles - a longer and more confusing labyrinth. You also need scissors, a sharp knife, a marker, tape or glue may come in handy.
Now we begin to create the first working module of our ultra-modern cybernetic mouse lair. To do this, draw two circles on one of the bottles, along which we will then cut out the gateway.
You should get two circles: a large one and a small one. Another bottle should subsequently fit into the large circle, and only the neck of this bottle should come out through the small circle on the other side. Be sure to take these dimensions into account when designing the airlock (I was estimating with my bulbous naval eye, but experienced engineers can use a caliper or a simple ruler).
When the graphic constructions are completed and carefully verified, you can cut out the holes using a knife and scissors. ATTENTION! BE CAREFUL, THE PLASTIC OF THE BOTTLE IS QUITE FICIOUS WHEN CUT OUT, YOU CAN GET CUT VERY EASILY.
On the other bottle you just need to cut a small hole (so your rodent can fit through it).
Now we connect two bottles, as shown in the figure.
Just like that, we got the finished node of our labyrinth.
The cap can be screwed on if it improves the hold of the bottles. But usually they hold up well anyway, thanks to the ring at the neck, which was originally intended for more convenient transportation.
If you still can’t figure out how the rodent will move in this block, then look at the view from the inside. The inner bottle is turned with a hole towards the longitudinal axis of the second bottle, so your pet can easily crawl from one bottle to another.
Then you can complete the labyrinth yourself, attaching bottles to each other by analogy. If cold and sober calculation cannot keep up with your wild imagination and something doesn’t hold well or even falls off, then tape or glue can easily solve the problem. This is the project I came up with:
Let me clarify a few points about the labyrinth. This concept is suitable for any mice, rats or hamsters. They will get through, don't be afraid. In nature, these rodents dig even narrower holes for themselves. I can't vouch for the guinea pigs alone. The likelihood that a rodent will injure itself on the unevenly cut edge of a bottle is practically zero. Nature took good care of the vitality of these animals. It is also impossible to suffocate inside the structure, unless, of course, you decide to completely seal it. To be on the safe side, do not leave your pets unattended in the maze. A rat, for example, can chew through glass or even concrete.
Perhaps that's enough theory, let's move on to practice